Final Game Project Lab
Part 1 - Create an HTML file
1. Begin by creating a blank file named “index.html” and copy the following content (click on 'Copy to Clipboard' button) and paste (ctrl-v) into the file and save.

|
<html> |
The browser will read the “.html” extension and know to interpret it as an HTML document. The file can be named something different, but it’s common practice to name the main entry point of a website “index”, as that is what web servers often use to display the default page of a website directory.
Note: make sure that if file extensions are not displayed on your system that you don’t accidently create the file with a “.txt” or similar extension.
HTML (Hypertext Markup Language) uses a system of “tags” to denote elements in a tree-like structure. Here is a description of the HTML tags you copied and pasted into your code file:
- A tag starts with the tag name surrounded by angle brackets, like: <html>
- A tag ends the same, but with a forward slash before the tag name: </html>
- Between the tags, text or other tags can be written: <html>
...<body><!-- body content --></body></html> - The root of the HTML document must be an “html” tag, which should have two child tags, called “head” and “body”.
- The text between “” is ignored and is called an HTML comment. The browser will skip any of this text, and it is mainly used for making your code easy to read.
Note: whitespace is ignored and is used only for readability of the code. This is true for tabs, spaces, and line breaks.
Part 2- Adding HTML Title, H1, H2 Tags
The “head” tag is used for various attributes that describe characteristics about the document, such as the page title or external resources to load. Inside our header tag, between the start and end tag, let’s add a title for our game using a “title” tag. You can personalize it with your name if you’d like.

|
<title>Myawesomegame</title> |
Try running your file in the web browser. The window title should display the title text that you created:
 |
That window looks awfully blank though. Let’s add some content to it. Page content goes inside the “body” tag. Let’s start by displaying our game’s title in a nice, big font. To do this, we’ll use a header tag. There are a variety of these, from “h1” for the largest to “h6” for the smallest; we’ll go with an “h1”. Refresh the page in your browser and the text should appear
 |
<h1>Myawesomegame</h1> |
Because this is gearing up to be such an awesome game, you should take credit for it. Add some smaller text (using an “h2” tag) to add your name.
 |
<h2>By[YOURNAMEHERE]</h2> |
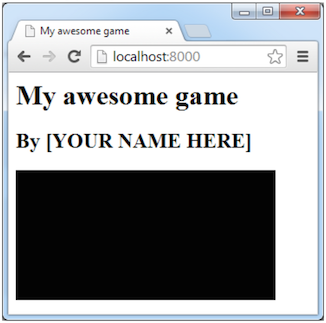
Refreshing the window should now look something like this:
 |
Part 3- Canvas Tag
Now for the actual game window that we will be interacting with. While it’s possible to do a lot of stuff just using HTML tags, games can leverage a special HTML tag called “canvas” to display incredibly powerful and dynamic content. Add a “canvas” tag to the document body.
 |
<canvas/> |
Note: if tags don’t have any child tags or text, you can shorten them using the form <tagname/>, instead of <tagname></tagname>.
You’ll notice if you refresh the page that nothing appeared. That’s because the canvas is blank and isn’t displaying any content. Let’s fix that by changing an attribute on the canvas tag.
Attributes are modifiers to tags and are defined inside the tag start in the form attributeName="attributeValue". For this case we want to modify the “style” attribute.
The style attribute uses another coding language called Cascading Style Sheets (CSS). These sub-attributes can be defined inline using the form property:value.
Try setting the canvas’ style property “background” to the color “black”:
 |
<canvas style="background:black"/> |
Refreshing your game should now look something like this:
 |
Part 4- Adjusting Canvas Size
Looking better, but it’s still kind of small. Let’s dynamically resize the canvas element using Javascript code. First let’s create a “script” tag after your canvas element. The tag should have the attribute “language” set to “Javascript” so that the browser knows to interpret this script using Javascript.
 |
<script language="Javascript"> |
Inside your script, let’s set some variables for how large we want the game canvas to be (in pixels, the discrete digital dots that make up your monitor). Variables are declared using the keyword “var” followed by the variable name. We can assign values to variables as well using the assignment operator (equals). In this case, however, we don’t want the value to ever change while the game is running so we can declare the variable using the keyword “const” instead to make the value unchangeable.
 |
const appWidth = 640; //definethewidthinpixels const appHeight = 480; //definetheheightinpixels |
To make sure that Javascript is working, add a few more lines that will print to the console the values you declared:
 |
console.log(appWidth); console.log(appHeight); |
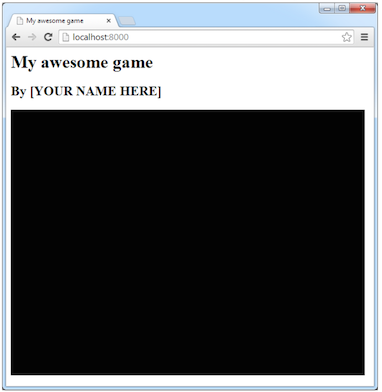
Refreshing your browser should now show a large 'black' box.
Note that any text after a “//” in Javascript is interpreted as a comment and will be ignored by the browser. It’s good practice to include comments throughout your code to document what the code is supposed to be doing so that you can more easily understand and maintain the code as it increases in complexity.
Part 5- Changing Canvas Background
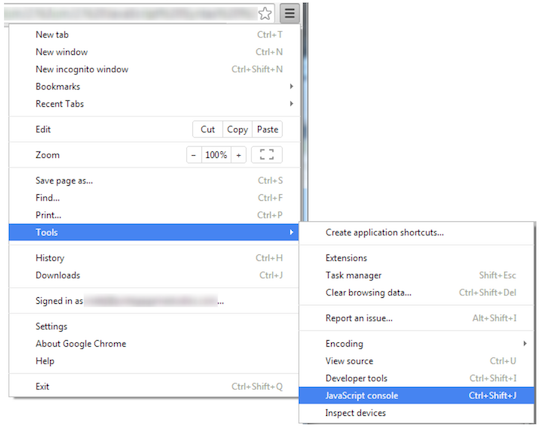
Refresh your browser page once more and open the Javascript Console:
 |
You should now see the values printed to the console:
 Watch Step
In order to resize our canvas, we need to get a reference to the canvas object on the page. To do this we need a unique identifier that can easily distinguish our canvas from other page elements. Add an attribute “id” with the value “game” to your canvas tag:
 |
<canvas id="game" style="background:black"/> |
In your Javascript code, tell the browser to find the HTML tag that we marked and assign it to a variable. You can also get rid of the console log messages, as we no longer need them.
 |
var theCanvas = document.getElementById("game"); |
Here we take a global object called “document” which refers to the entire page and calls a function (method) called “getElementById” with a string parameter of “game”. That method finds the HTML tag that has an “id” attribute of the provided name (“game”) and returns a reference to it. We then declare a variable called “theCanvas”, assigning the function’s return to this newly created variable.
Now that we have a code reference to the canvas tag, let’s resize it. Set the width and height properties of the canvas variable to the width and height you defined:
 |
theCanvas.width = appWidth; theCanvas.height = appHeight; |
We could have set the size using CSS style attributes, but we’ll want the canvas in Javascript accessible for dynamically drawing things in upcoming modules.
Refresh your browser window to see your larger canvas.
 |